Website Builder > Page Types
Page Types
Learn how to add custom page types to the Website Builder's Create Page dialog.
- what page types are and how they work
- how to register a custom page type
- how to filter or remove existing page types
Overview
When a user clicks Create Page in the Website Builder, a dialog appears with a Page Type dropdown. Each entry in the dropdown is a registered page type — identified by a unique name and displayed with a human-readable label.
By default, only the Static Page type is registered. You can add new types and filter existing ones using the PageType and PageTypeProvider abstractions from webiny/admin/website-builder.
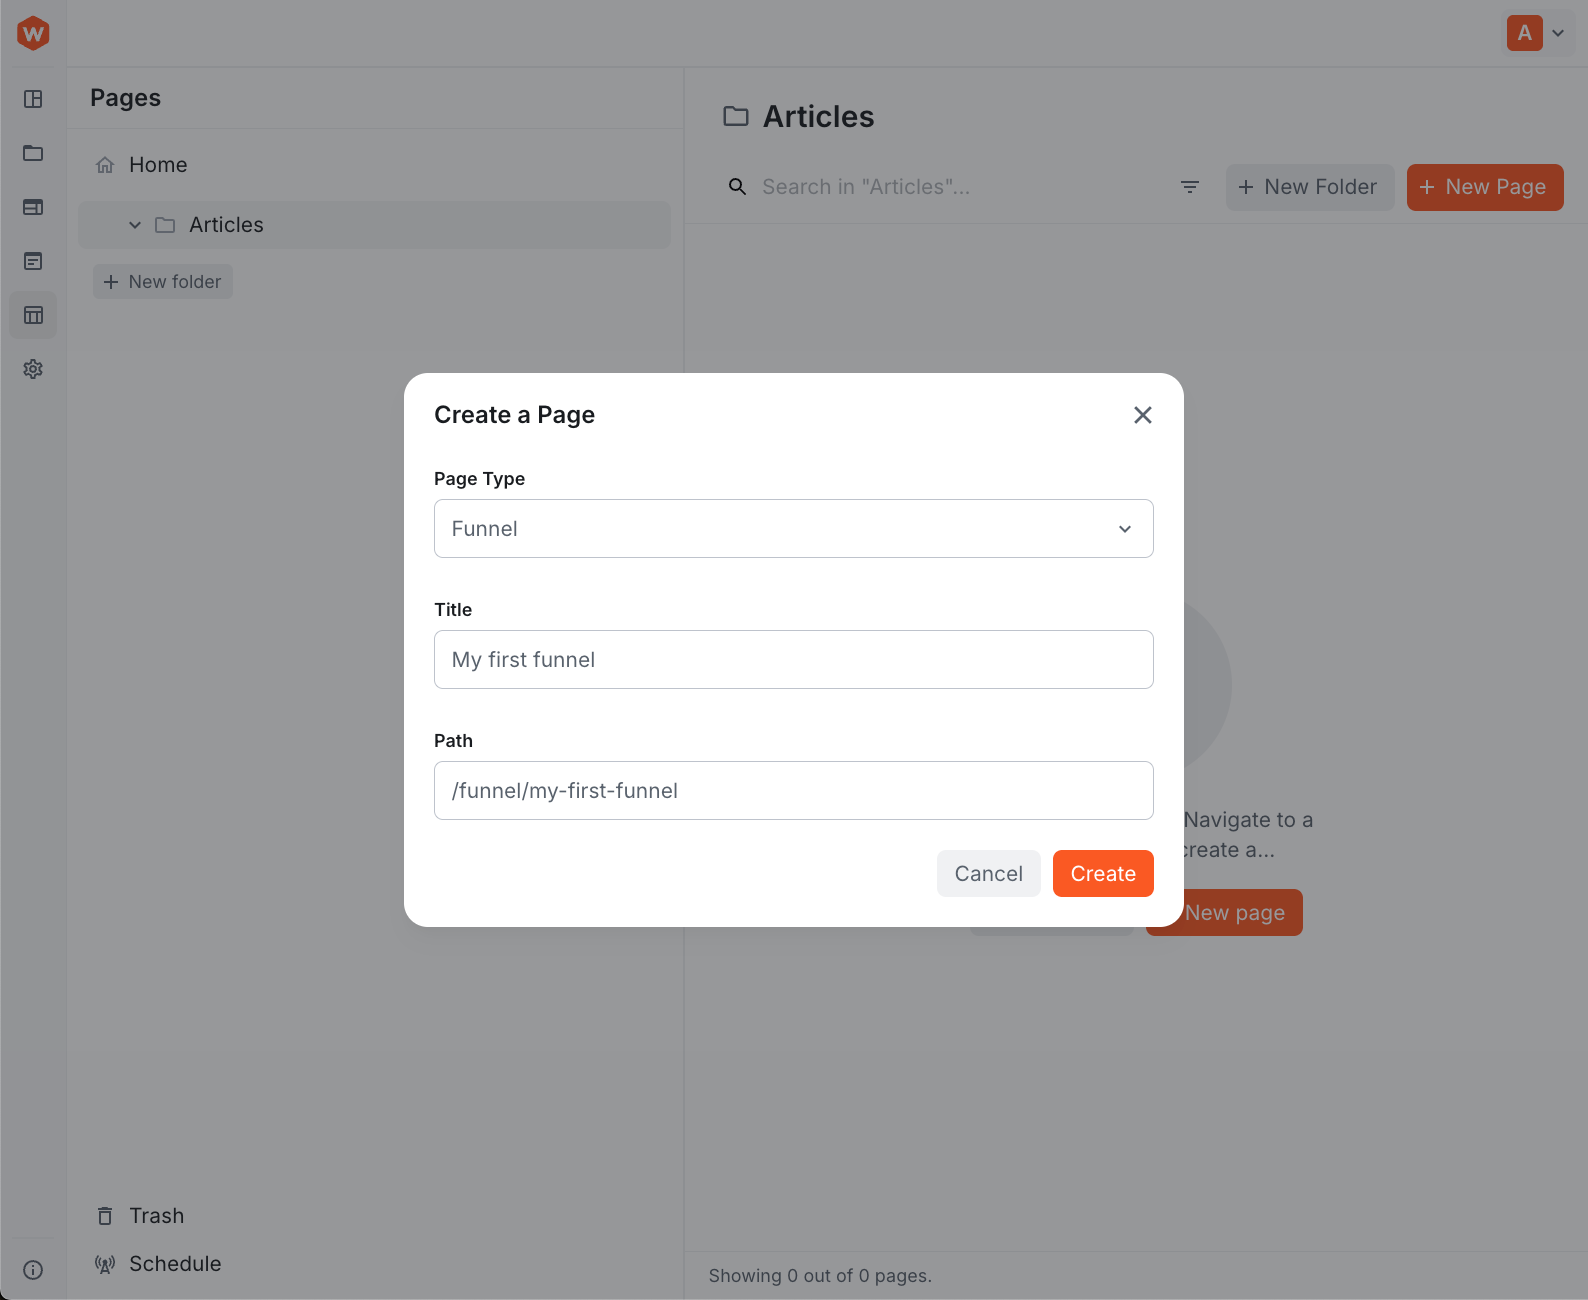 Create a Page dialog with page type options
Add a Page Type
Implement PageType.Interface, which requires two properties: name (a unique identifier stored on the page when created) and label (the text shown in the dropdown):
Filter Page Types
To remove or filter existing page types, decorate the PageTypeProvider abstraction. The decorator receives the original provider as decoratee and returns a modified list from getPageTypes():
This removes the built-in Static Page type. Omit the .filter() call if you only want to inspect or reorder the list without removing anything.
Register the Feature
Wire the implementations together using createFeature and RegisterFeature from webiny/admin:
container.register(RetailPageType)— adds the new page type to the dropdowncontainer.registerDecorator(FilterPageTypes)— applies the filter; omit this line if you don’t need to remove existing types
Then register the extension in webiny.config.tsx: